Saturday, July 19, 2014

Java basics Tutorial 2 | Indihack

Java basics Tutorial 2
http://www.somanyword.com/wp-content/uploads/2013/11/Java.jpg


In this tutorial we are going to learn about  conditonal statement in which we are going to see if else if else if  else and switch statemet. Hope you like this tutorial.


Conditional Statements
Very often when you write code, you want to perform different actions for different decisions. You can use conditional statements in your code to do this.
In JavaScript we have the following conditional statements:
  • if statement - use this statement to execute some code only if a specified condition is true
  • if...else statement - use this statement to execute some code if the condition is true and another code if the condition is false
  • if...else if....else statement - use this statement to select one of many blocks of code to be executed
  • switch statement - use this statement to select one of many blocks of code to be executed


If Statement
Use the if statement to execute some code only if a specified condition is true.
Syntax
if (condition)
  {
  code to be executed if condition is true
  }

Note that if is written in lowercase letters. Using uppercase letters (IF) will generate a JavaScript error!

Example Program :


<script type="text/javascript">

//Write a "Good morning" greeting if

//the time is less than 10


var d=new Date();

var time=d.getHours();


if (time<10)

  {

  document.write("<b>Good morning</b>");

  }

</script>


If...else Statement
Use the if....else statement to execute some code if a condition is true and another code if the condition is not true.
Syntax

  if (condition)
  {
  code to be executed if condition is true
  }
else
  {
  code to be executed if condition is not true
  }
Example Program :

<script type="text/javascript">
//If the time is less than 10, you will get a "Good morning" greeting.
//Otherwise you will get a "Good day" greeting.

var d = new Date();
var time = d.getHours();

if (time < 10)
  {
  document.write("Good morning!");
  }
else
  {
  document.write("Good day!");
  }
</script>


If...else if...else Statement
Use the if....else if...else statement to select one of several blocks of code to be executed.
Syntax

  if (condition1)
  {
  code to be executed if condition1 is true
  }
else if (condition2)
  {
  code to be executed if condition2 is true
  }
else
  {
  code to be executed if neither condition1 nor condition2 is true
  }
Example Program :


<script type="text/javascript">
var d = new Date()
var time = d.getHours()
if (time<10)
  {
  document.write("<b>Good morning</b>");
  }
else if (time>=10 && time<16)
  {
  document.write("<b>Good day</b>");
  }
else
  {
  document.write("<b>Hello World!</b>");
  }
</script>


JavaScript Switch Statement

Conditional statements are used to perform different actions based on different conditions.
The JavaScript Switch Statement
Use the switch statement to select one of many blocks of code to be executed.
Syntax 
switch(n)
{
case 1:
  execute code block 1
  break;
case 2:
  execute code block 2
  break;
default:
  code to be executed if n is different from case 1 and 2
}


This is how it works: First we have a single expression n (most often a variable), that is evaluated once. The value of the expression is then compared with the values for each case in the structure. If there is a match, the block of code associated with that case is executed. Use break to prevent the code from running into the next case automatically.

Example Program :

<script type="text/javascript">
//You will receive a different greeting based
//on what day it is. Note that Sunday=0,
//Monday=1, Tuesday=2, etc.

var d=new Date();
var theDay=d.getDay();
switch (theDay)
{
case 5:
  document.write("Finally Friday");
  break;
case 6:
  document.write("Super Saturday");
  break;
case 0:
  document.write("Sleepy Sunday");
  break;
default:
  document.write("I'm looking forward to this weekend!");
}
</script>


Next Chapter We will learn to create popup box in JavaScript.

Monday, July 14, 2014

Java Basics Tutotial-1 | Indihack

Java Basics Tutotial-1

http://happytech.org/wp-content/uploads/2013/10/java.jpeg 

Java is a high level programing language .Java help us to play online games, chat ,audio and video and much more. Java is mostly used in e-banking and e-marketing areas.  This tutorial will teach you about java programing.  Java is simple and easy to compile, run, debug other than various programing languages. Java is a platform which is flexible and most significant feature of java is to run a program easily from one computer to another.Now check the example program copy and paste it in notepad and save it anything.html.  
Example Program 1 :

<html>
<body>

<h1>My First Web Page</h1>

<script type="text/javascript">
document.write("<p>" + Date() + "</p>");
</script>


</body>
</html>
 Example Program 2 :


<html>
<head>
<script type="text/javascript">
function displayDate()
{
document.getElementById("demo").innerHTML=Date();
}
</script>

</head>
<body>
<h1>My First Web Page</h1>
<p id="demo"></p>
<button type="button" onclick="displayDate()">Display Date</button>
</body>
</html>
 
 In Tutorial Two we will see What are if else statement and how to use it and various program
Thanks for reading

You may also like : Innobuzz Hacking E-book 

Saturday, July 12, 2014

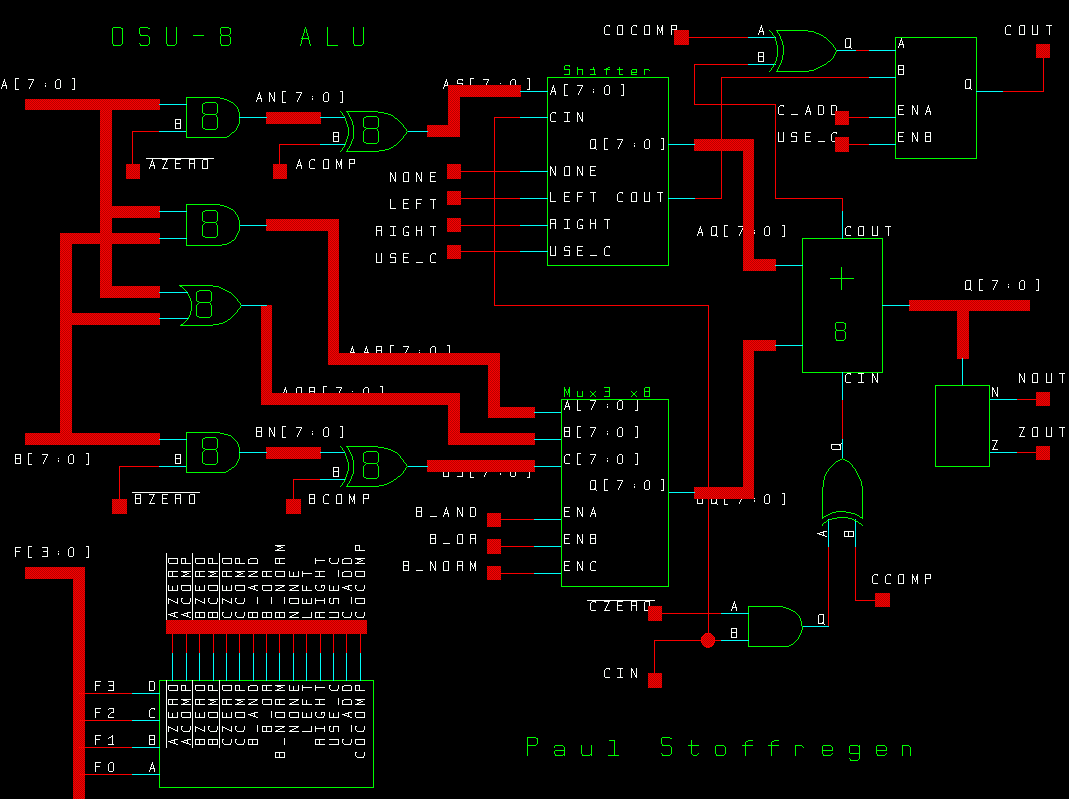
Basics of the Alcatel Operating System

Basics of the Alcatel Operating System

https://www.pjrc.com/tech/osu8/sch/alu.gif

The following labs are designed to familiarize the student with the basics of the Alcatel
Operating System (AOS). Labs include gathering basic switch information, the Working and
Certified directories, basic CLI introduction as well as USB support and software upgrades.
We will also review remote access capabilities, redundancy (where equipment permits) and
basic switch access rights.

This Complete Kit is provided By Indihack Corporation to make visitors satisfied with the content .  You can download this kit from the link given below:

Thanks for visiting :)


http://adfoc.us/22615844229733


Thursday, July 10, 2014

Download 300 Flash Games for free| indihack

Download 300 Flash games no survey absolutely for free


indihack.net

Friends Download this set of flash games.This set is a collection of 300 flash games which is played across the internet.So download it fast Limited .


 Several popular multiplayer games from Windows XP have returned with a new look. These titles—available only in premium editions of Windows 7—allow you to play online against human opponents. The games don't work without an Internet connection.  Even if Windows doesn't locate an update or patch for your game, one might still be available. Some game publishers don't make updates available to Microsoft immediately. If you're experiencing problems with a game, or want to confirm your title is up to date, check the publisher's website.

http://adfoc.us/22615844046165

Monday, July 7, 2014

Whatsapp hack sniffer

whatsapp


Hello to all APAJR Lab readers in last post i describe about how to protect your whatsapp account getting hack from your enemies or Hackers. Today i am going to show you How to hack your victim Whatsapp account using whatsapp sniffer and wifi.  Whatsapp sniffer is a tools used for hack a whatsapp account to read conservation, images, videos and chats. This whatsapp sniffer method only work when victim on same wifi network (open/wep/wpa/wpa2).

Requirement:

  • Rooted android phone
  • Supported platform ( Android, Nokia, IOS,) May we work on windows (Not rested). Not work on blackberry
  • You and Victim in same wifi network
  • Wifi security (Open/wep/wpa/wpa2)


How it work :


Whatsapp sniffer hack your victim whatsapp account, when both (you and your victim) in same wifi network (open/wep/wpa/wpa2). Whatsapp sniffer capture all packet and cookies from your victim device using whatsapp server and sent to your device. so your able to access your victim whatsapp account.

What we can do with whatsapp sniffer tools  :


your able to read all conservation, images, videos and your also able to chat with your victim account and contact. Your eligible to change your victim Names and personal information on whatsapp.


download here

How to make windows7 Genuine using CMD| Indihack

Have You Ever thought of Making Windows 7 Genuine Using Command Prompt Directly Without Using any Activation Crack, Remover, Wat or Loader ? – So Today Here I'm Going to Tell you a very Simple Procedure to Make Your Windows 7 Genuine Using Command Prompt. Because of the High Price of Original Windows 7 Not Everyone Can afford to buy Original Microsoft Windows 7 OS, So they Prefer to Use Cracked Version or Pirated Versions of Windows. Due to Use of Pirated Copy of Windows 7 they often face the Error “Windows 7 is not genuine” and because of this they are Unable to Change the Desktop Background Settings and Control Panel Settings and more. So Here is A Step by Step Tutorial on How to Make Windows 7 Genuine Using Command Prompt Without Using any Activation Cracks or Loader.

How to Make Windows 7 Genuine Using Command Prompt : Steps to Follow

  • First of all You need to Open Cmd ( Command Prompt ) as an Administrator.To Open it as an Administrator Type CMD. Click on Start menu and type CMD and right click on CMD and select run as Administrator, Shown below in the Image.


  •  Now Type the Command SLMGR -REARM in cmd as Shown below in the Image.


How to Make Windows 7 Genuine Using Command Prompt

  • Press Enter and Wait For Few Seconds
  • After a Few Seconds a Message Dialog Box Will open Specifying Command ‘ Completed Successfully. Please Restart the system for the Changes to Take effect ‘ as Shown below in the Image.
                                How to Make Windows 7 Genuine Using Command Prompt

  • Restart Your Computer and Your all done. Now You are Free of the Error ‘Windows 7 is Not Genuine’
Note - You Must Run Command Prompt as an Administrator Else this Method Will Not Work.


Friday, July 4, 2014

Redirect URL in Blogger| Indihack


http://www.makingdifferent.com/wp-content/uploads/2013/03/New-Javascript-Automatically-Redirect-A-Blogger-Blog-To-Another-URL.jpg


Blogger is providing you with some more features to deal with search preference like adding search description for your blog, adding robots.txt as well as setting custom redirects. This all deals with SEO and so you have to make proper use of that. Setting custom redirects in Blogger is one of the best way to avoid broken links and reduce 404 error pages within your blog. Here we will discuss about Blogger custom redirects and the use of redirecting old URL to new URL in Blogger.

Blogger custom redirects :-

Use of redirecting old URL to new URL in Blogger

As we mentioned above redirection reduces the number of broken links and 404 errors in your blog. Generally 404 error pages are not bad for SEO and Google doesn’t impacts the site rankings. But there is something you need to deal with 404 error pages.

Let us say if you have deleted a page or changed its URL for some reasons. What if that page has some rankings in search engines as well as quality backlinks? Simply users who come by organic search results and backlinks will end up seeing 404 error pages which is  no use for users. This is one of the reason you have to make use of Blogger custom redirects. Another reason you have to redirect of old non existing URLs to new ones is to pass the link juice.

Before redirecting your URLs you must know these two things. You can make two types of redirects that is (301 redirect) moved permanently. If you are deleted or changed any URL of your post then you have to do permanent redirect 301. This passes all the SEO value to your new URL as well as users will benefit from this.

The another one is (302 redirect) moved temporarily. When you migrate to other blogging platforms like wordpress then you can use 302 temporary redirect. Also you can use this for maintenance pages and futures pages.

How to redirect old URL to new URL in Blogger :-

Let us say you have a page with ugly URL like this yourblog.blogspot.com/p/blogpage10.html and you wish to change it to something unique like this yourblog.blogspot.com/p/contact.html. So here is the way to redirect old URL to new URL in Blogger.

Login to you Blogger account and Go to your Blogger blog dashboard and go to settings >> search preferences. In errors and redirection set new redirect and enter from URL (/p/blogpage10.html) this redirects to your new URL (/p/contact.html). Check permanent if you want and save the custom redirect and save changes.


Note: Do not enter the full URL in that field. Just omit the domain name and enter remaining permalink i mention above. and  this will works only if your wish to redirect within your Blogger and not in any external links.

Also to make this redirect for mobile friendly just add ?m=1 at the end of the old URL that you are redirecting.

http://yourblog.blogspot.com/2014/06/redirectedurl.html?m=1

Hope this post helped you to understand Blogger custom redirects, use of redirecting old URL to new URL and how to redirect old URL to new URL in Blogger. Please share and feel free to leave your comments.

You may also like : Windows7 Genuine Trick